USING
To Start Race Catcher
In order to be analyzed by Race Catcher your Java application has to be started with java agent (in SUM-Enabled mode). This is done by using provided convenience scripts where instead of "java" you type "jta". For example, from a command line you would type "jta -jar myjar.jar".
To run your SUM-Enabled Java application within environments like Eclipse, NetBeans or any other environment or script, add to your projects VM optional arguments an expanded jta script as demonstrated in this help under Installing / Run SUM Enabled.
To see the results of the analysis you need to start the SUM UI (SUM User Interface). It can be started before, during, or after the application run.
In any operating system you can type sumui from the command prompt or
In Windows you can also use the link Start / All Programs / ThinkingSoftware / Race Catcher
When To Bring Source
Configure Do Not Study
Add Classes
Manual Project
Decompile
Expand
Animate
Publish
Subscribe
View / Remove Projects
Version

When To Bring Original Sources
Note: Open Source Class files are automatically decompiled and models are automatically built when you click on a method reported in the contention table as having a race.
-
You may need to attach the original source code when the model is not built due to the de-compiler error. Note that decompilation is allowed only for the automatically verified open source. A message box will prompt you to find the original source code.
-
When a threading issue is diagnosed in your proprietary code (you are running licensed version) and you have access to your code.
In the example below:
While clicking on the Method "getServlet" in order to visualize the threads contentions in it we get the following message: "Model of the class org.apache.jasper.servlet.JspServletWrapper is not available.

There are 4 ways to attach the source code:
All of these methods will verify the files/folders your point to and will attach to the nodes of the class files only the appropriate source files. The package and the class names encoded in the source files are being verified.
The first two methods of Bringing the Source Files are available by the right mouse click on the node of a class.
1. Attach Source File – will ask you to point exactly to the original source code file. If the file you point to does not contain the correct class it will not be associated with the node of this class.

2. Attach Sources from Folder – this method is more convenient since all you need to do is to point to a parent (that can be a somewhat a distant parent) of the package. Correct package will be located and corresponding source files will be attached to the corresponding nodes of classes.

The next two methods of attaching the source files are available by the right mouse click on the node of the project of the Class Tree View.
3. Attach Sources from Folder – will locate and attach all the corresponding source files found under the folder you point on (could be a somewhat distant parent folder) to the corresponding class nodes across entire project, but only for the classes where Source Files are not already attached or where the attached source files were the result of decompilation.

4. Re-Attach all Sources – will locate and re-attach all the corresponding source files found under the folder you point on (could be a somewhat distant parent folder) to the corresponding class nodes across entire project.
Configure the Do Not Study List
Race Catcher uses Do-Not-Study List to differentiate between "To Study" or "Not To Study" classes.
The list contains the packages Not-To-Study, therefore any class that belongs to any of the (Do Not Study) packages will not be studied when you run your application in the SUM-Enabled Mode. Alternatively, any loaded by JVM class that belongs to a package that is not in this list will be studied by Race Catcher.
That allows you to minimize the work to be done by Race Catcher when not necessary. The default configuration is already doing it for you.
To Add a Package to Do Not Study List
1.In Race Catcher, click Tools/Do Not Study List (Shift+Z). The Race Catcher Do Not Study List will appear as shown below:

2. Type the package name up to a period on any level (i.e., com. or com.acme.) to be added in the Add field, and clickAdd.
3. Click Save. Race Catcher will now NOT study any class of this package when you are running your application in the SUM-Enabled mode.
To Delete a Package from Do Not Study List
1. In Race Catcher, click Tools/Do Not Study List. The Configure Do Not Study List dialog box appears.
2. Uncheck the package.
3. Click Save. Race Catcher will now study the classes of this package when you are running your application in the SUM-Enabled mode.
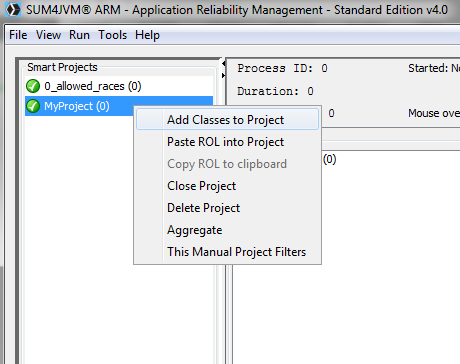
Add Classes to the Project
1. In Race Catcher, click File/Add Classes to Project. The Select Jar File(s) and/or Folder(s) dialog box appears.

2. Select the Jar file that you want to add to your project as shown below:
3. Click Open (or Choose).

Class files can be selected as well as jar files. Multiple selections are supported.
Create Project Manually
1. In Race Catcher, click File/Create Project Manually. The Input dialog box appears as shown below:

2. Enter project name in Project Name text field. You can use alpha/numeric characters and underscores.
3. Click OK. The Select Jar File(s) and/or Folder(s) dialog box opens.
4. Select Jar File(s) and/or Folder(s). Multiple selections are supported.

5.Select the new project on the Project List View and press the space bar (or "V" for View). The list of packages expanded into classes will appear.

Decompile Classes
(*) Class files are automatically decompiled and models are automatically built when you click on a method reported in the contention table as having a race. However the decompilation is allowed by this product only for the automaticaly verified open source.
To Decompile a Class Manually
There are two ways to decompile class files manually:
1. You can decompile class files manually as a part of a Models Building process by pressing “B” (Build project models) keyboard key when your active view is (your cursor on) one of the two views: Project List view or Class Tree view.

2. You can also decompile a class using the Decompile and Build Model command by clicking the right-mouse button on a class node as shown below.

Expand Selected Class
You have an option to expand a selected class from the Main Menu via View/Expand Selected Class command.
To Expand Selected Class
1. In Race Catcher, select a class that you want to expand.

2. Click View/Expand Selected Class. The Class expands as shown below:

Animate Race
You can animate race contention with the Animate Race option. It enables you to view the threads side-by-side and trace the execution of threads up to a target of the race.
1. Right-click on any of the fields In the Thread Contention Table, and click Animate Race. The Race Catcher Race Condition view appears as follows:

2. Click Animate Race to see a potential execution path up to the target of the race.
The icon corresponding to the memory field being raced upon will blink. The source code will be animated in synchronization with the graph of the methods models.

Publish aggregated issues to your team members or tech support
Race Catcher pinpoints race conditions as they occur. It can collect and aggregate them from other machines of the same account on the LAN . In addition it can also securely publish these aggregated and consolidated analysis results to be viewed remotely by geographically dispersed tech support engineers.
To Publish Known Issues:
1. From the main menu use: Activity => View / Modify and select Enterprise mode
2. Provide the Account and Password of the channel where you would like to publish.
This will create securely encrypted channel.
4. The End Point URI to use is the same as automatically provided to you if you choose to publish to your own account.
(Different URL is automatically set for the subscription to supported open source projects).

Subscribe to published issues
Both, Workstation mode or Enterprise mode machines can subscribe to issues published by another Enterprise mode machine.
The Enterprise mode machine, being the publisher, could reside anywhere including being outside of your firewall.
To Subscribe to Known Issues:
1. From the main menu use: Activity => View / Modify and select Workstation mode or Enterprise mode.
2. Provide the Account, Password and the URL of the channel your are subscribing to.
This is the secured channel created by the publishing Enterprise machine.
3. Select Start Subscription.

View or Remove Projects
You can add to view or block from viewing by SUM UI individual projects runs using the [ ] View check box.
And you can remove projects from the knowledge base (SUM_KB folder) completely using the [ ] Remove check box.
To View or Remove Projects:
1. In Race Catcher, click File/View or Remove Projects. The View/Remove dialog box appears as shown below:
When the Projects panel is active, the operations will effect all the run instances of this project.

-
To view one or more projects, check the check box(es) in the View column.
-
To remove one or more projects, check the check box(es) in the Remove column.
To View or Remove Project's run instances:
1. In Race Catcher, click File/View or Remove Projects. The View/Remove dialog box appears.
2. Select the Runs tab as shown below:
When the Runs panel is active, the operations will effect specific listed run instances of this project.

To view Race Catcher version
Race Catcher(TM) version is seen on the UI title bar, along with the state the UI is presently in.
